

Hole 1
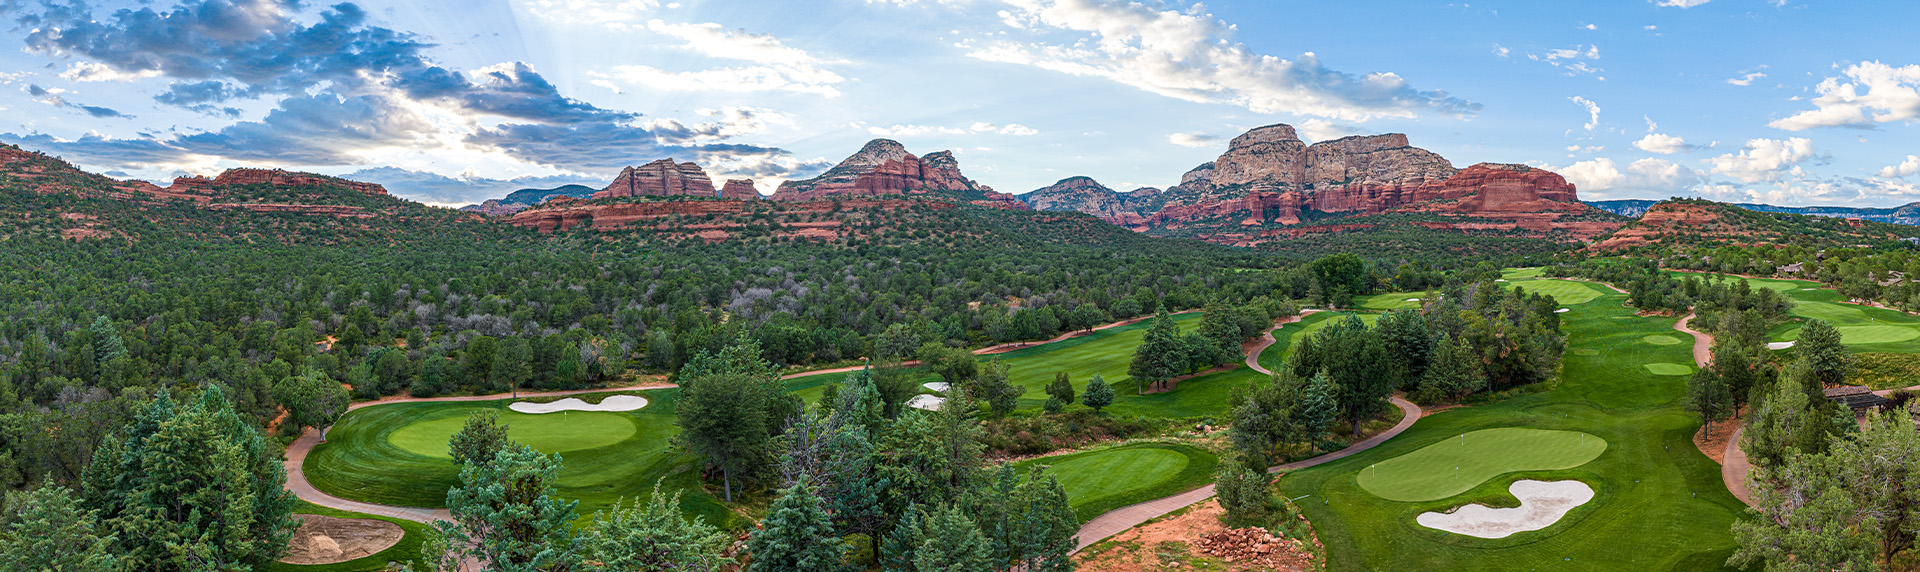
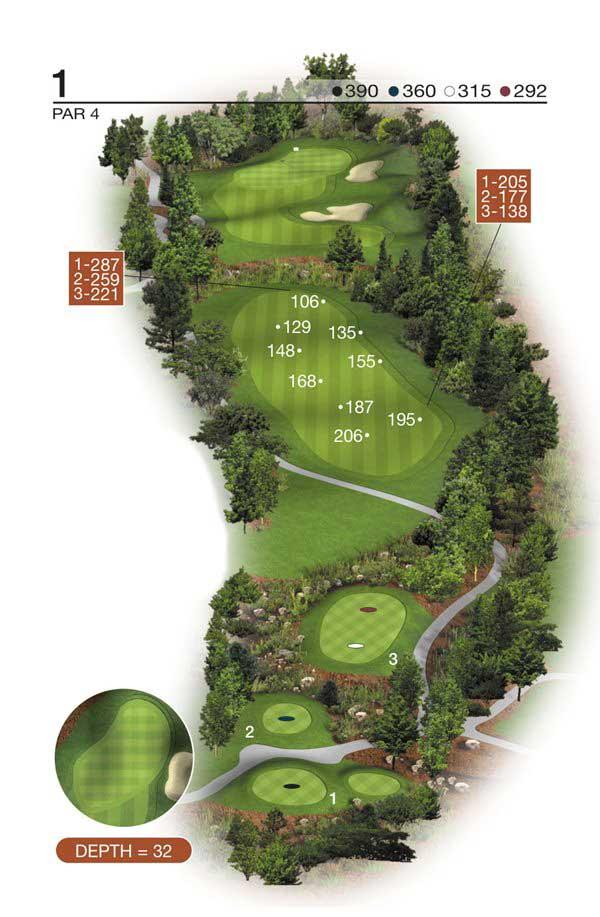
Hole one provides a straightaway par 4, calling for a demanding tee shot, preferably to the left side of the fairway.
A slightly uphill second shot to a well-protected, semi-blind green presents another challenge on this “subtle” hole.
Hole 2
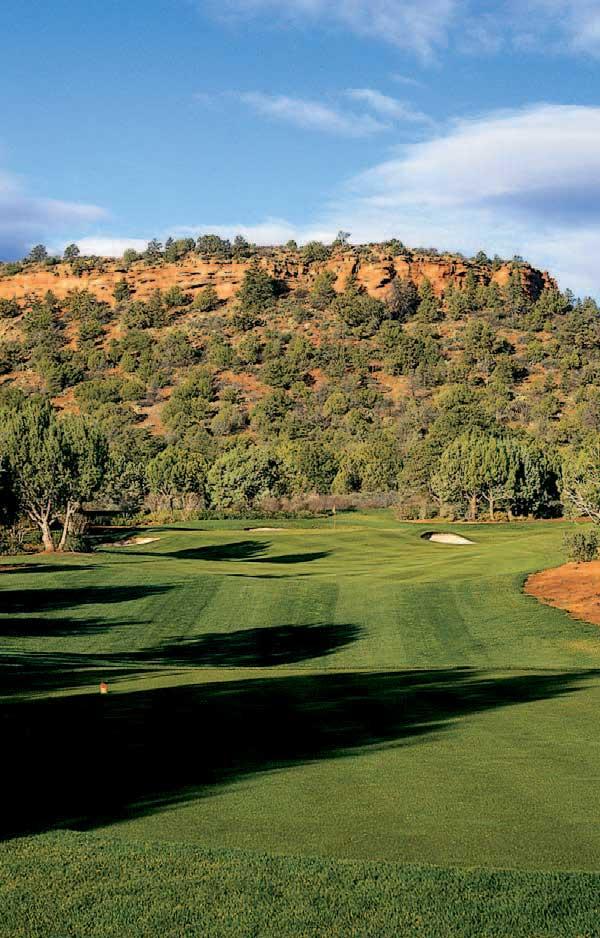
Bordering the Coconino National Forest, the shortest hole on the course begins with an uphill tee-shot to a well-bunkered green as well as a steep false front that repels any shot coming up short. An errant tee shot will likely guarantee a tough up and down, making par a good score.
Scorecard | Course Map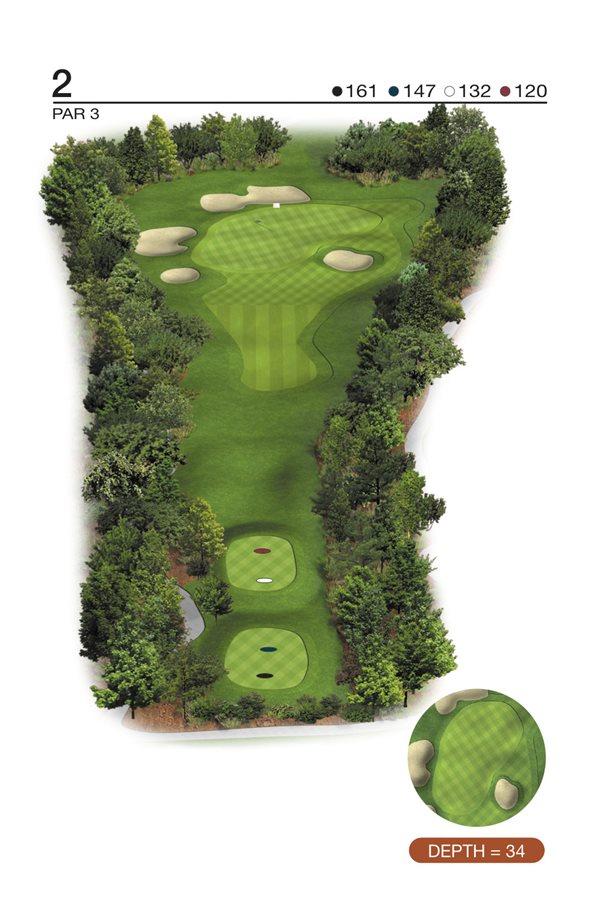
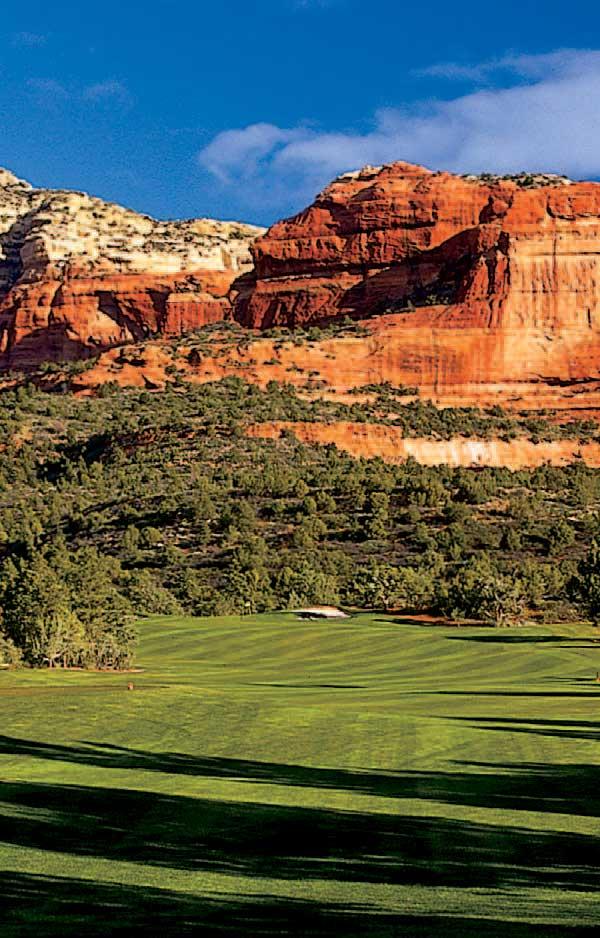
Hole 3
The beautiful backdrop on this short par 4, sets up a second shot to a green that is hidden and well bunkered. A narrow opening between two bunkers, short of the green presents the longest hitters with a drivable challenge.
Scorecard | Course Map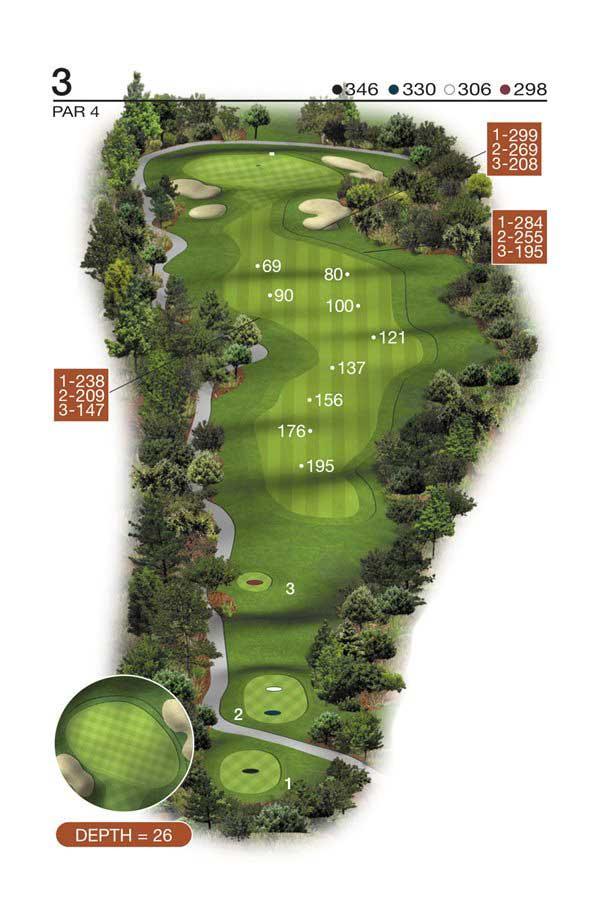
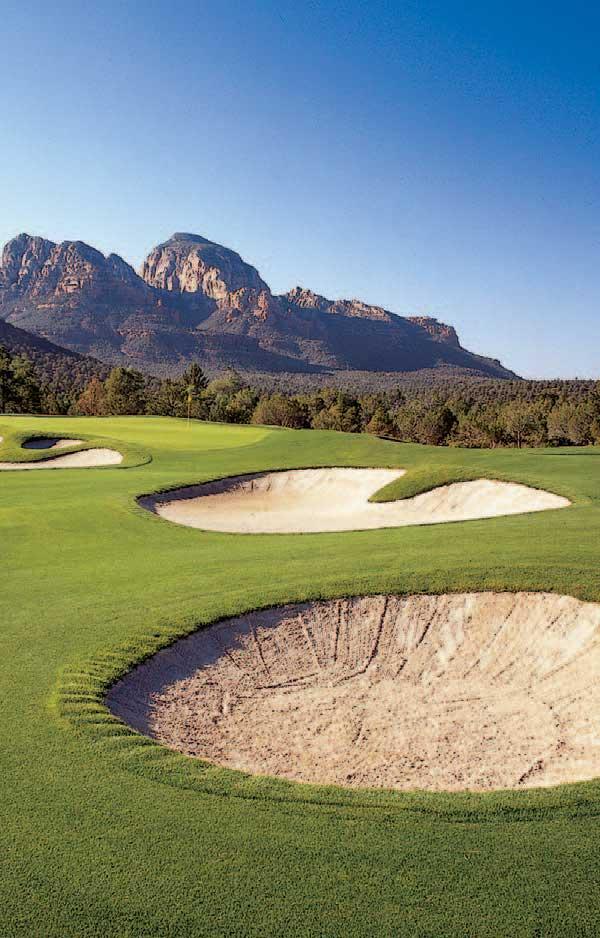
Hole 4
Trouble lurks on this Weiskopf trademark driveable par 4. More conservative players can choose to lay-up to a low or high fairway, separated by two cross bunkers. the green is Seven Canyons’ smallest and is protected by the deepest bunker on the course.
Scorecard | Course Map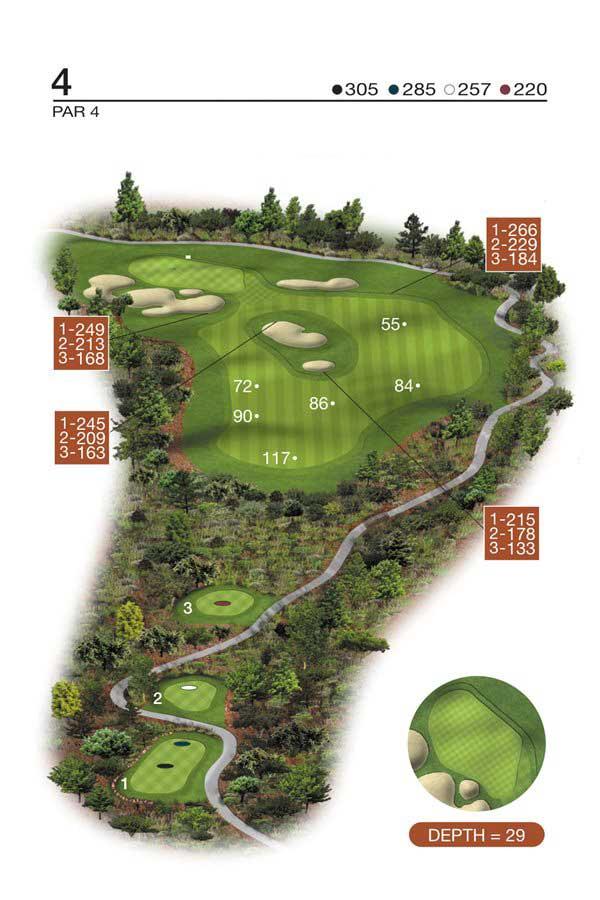

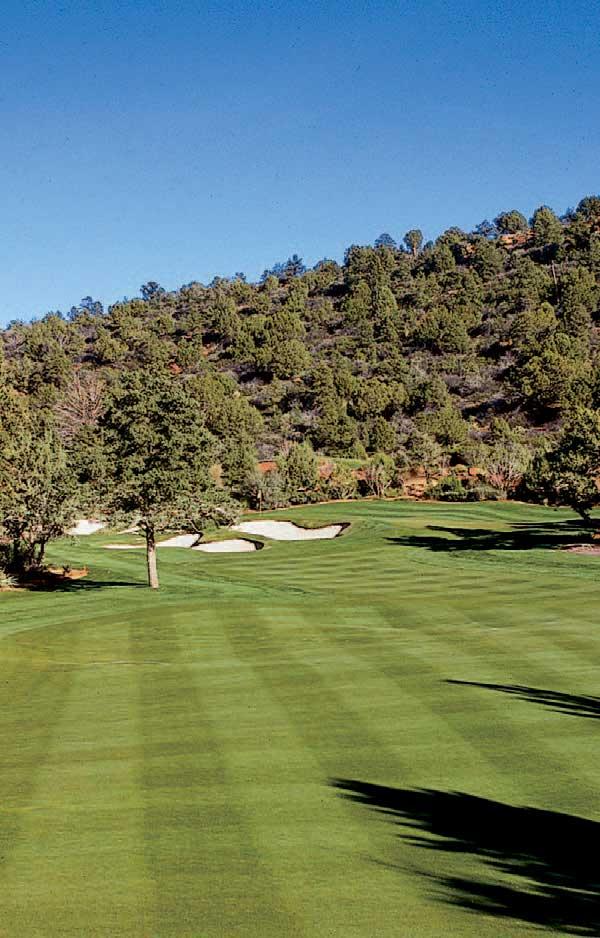
Hole 5
A fantastic risk/reward hole, this reachable par 5 offers an advantage to longer hitters who are able to place a precise tee-shot left of the fairway, aiming bunker and past the forest of pines. Any layup requires a well-played ball across the wash to a narrow landing area. The approach shot plays slightly uphill into this large contoured green that is protected by a deep bunker right, a pot bunker in front and collection area to the left.
Scorecard | Course Map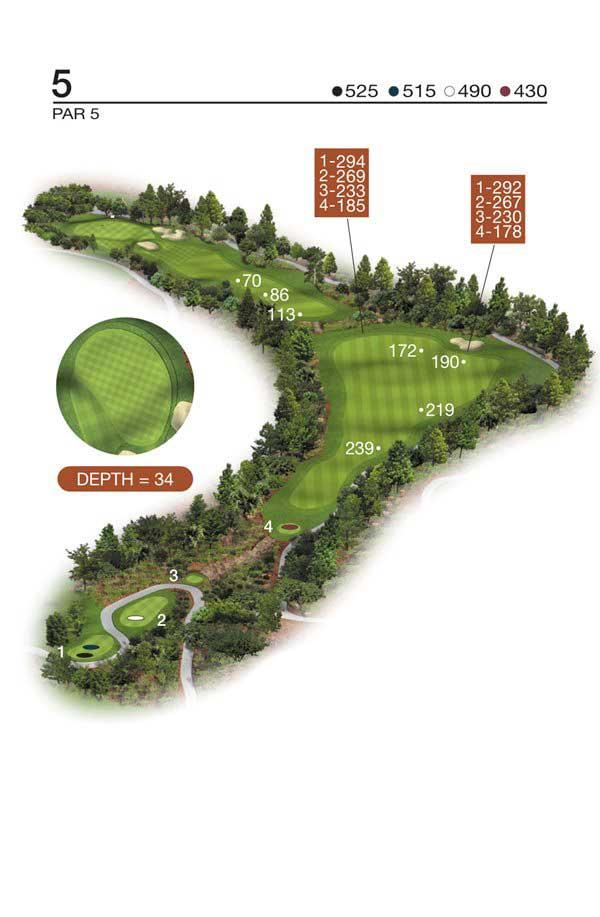
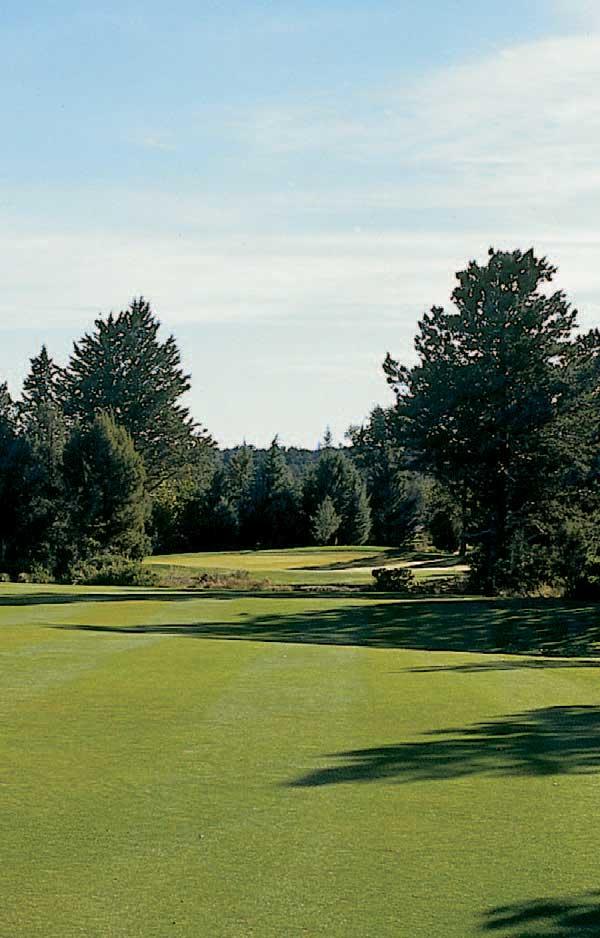
Hole 6
Placing a premium on positioning the ball in the fairway, the second shot plays uphill to a three-tiered green that is well protected by bunkers.
Scorecard | Course Map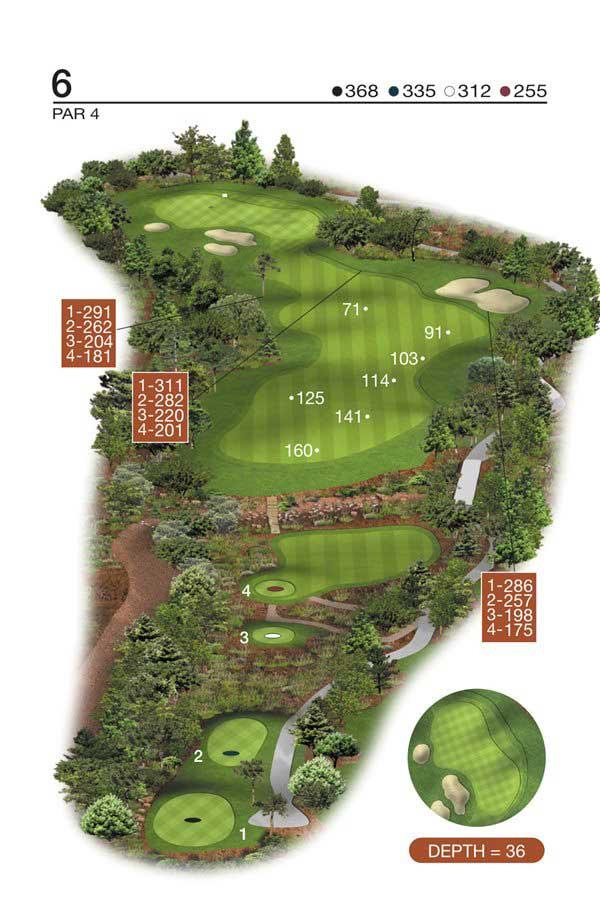
Hole 7
Requiring a very accurate tee-shot and an even more precise second shot, this reachable, downhill par 5 presents a great opportunity for birdie. The green is guarded by huge trees left and right with a wash crossing in front and running along the left side.
Scorecard | Course Map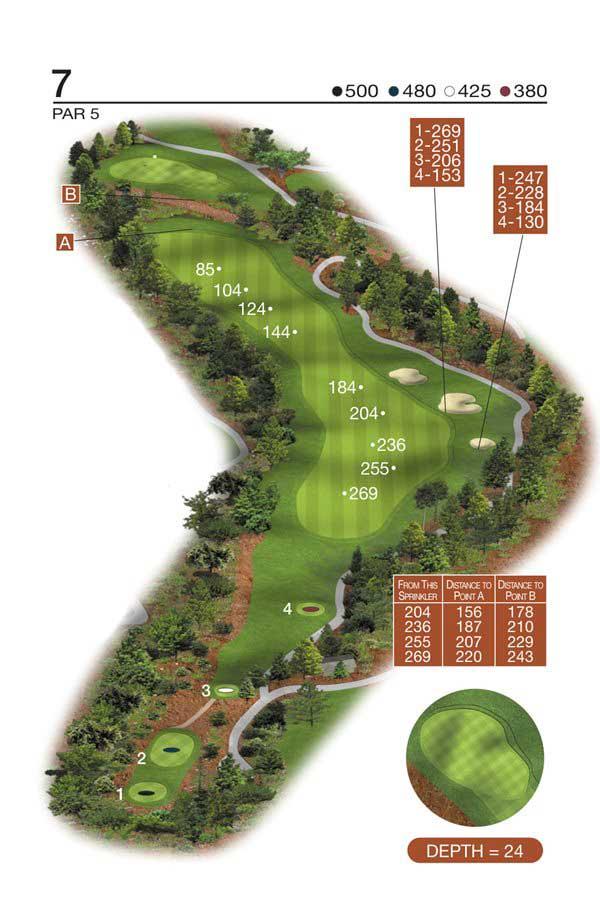
Hole 8
Quite possibly the most demanding tee-shot on the course, players hit out of a narrow chute of trees to a split-level fairway, this challenging hole features a green protected by a huge slope on the left and a deep bunker on the right.
Scorecard | Course Map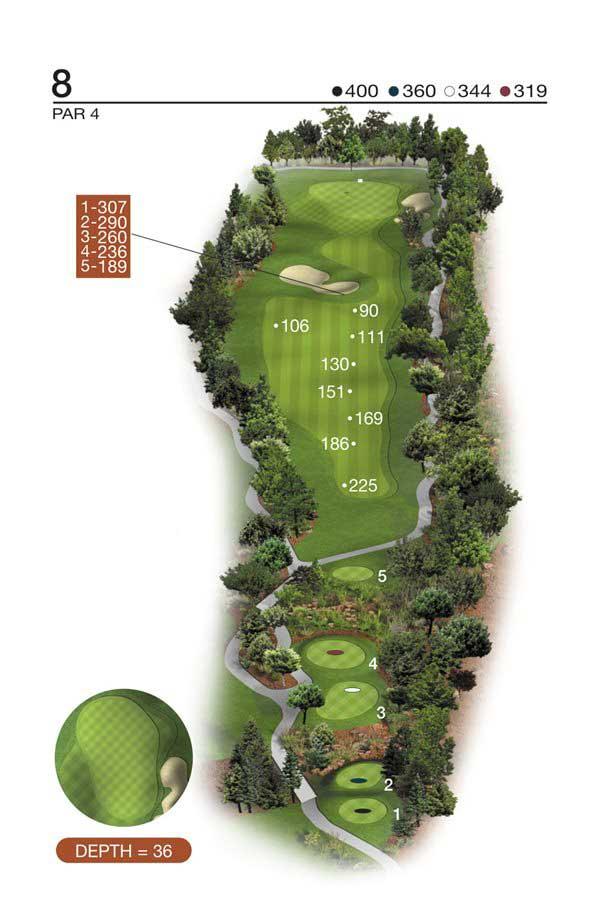

Hole 9
One of the longest par 3’s in Arizona, this beautiful 246-yard hole is further complicated by a wash that crosses in front of the daunting green. Short hitters may choose to lay-up.
Scorecard | Course Map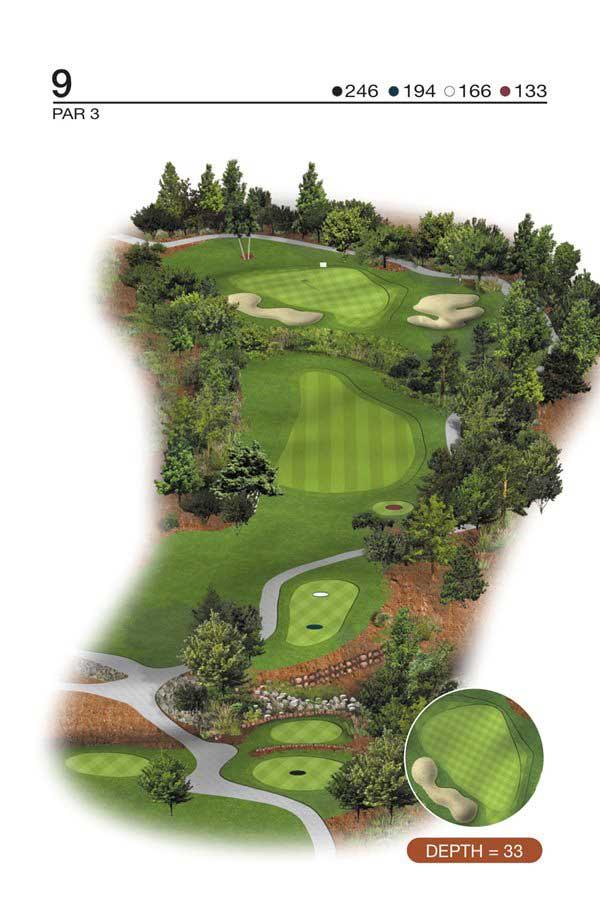
Hole 10
This 500-yard par 4 is sure to test every skill level. Playing uphill with penalizing fairway bunkers and a two-tiered green, par is a great score on this hole.
Scorecard | Course Map
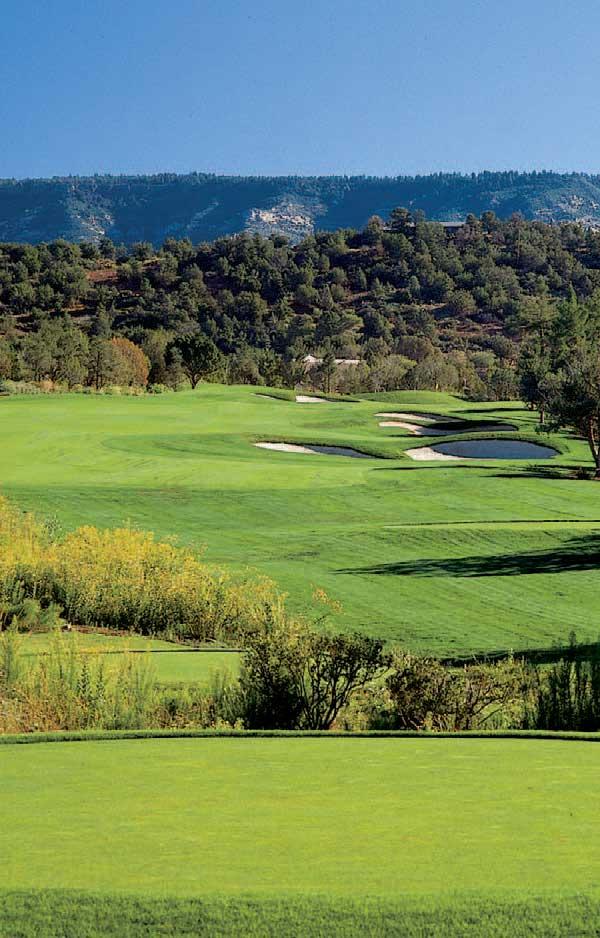
Hole 11
Following a well-placed drive, the approach shot is key as a deep bunker protects the green to the left. Missing the green on the second shot sets up a bogey or worse.
Scorecard | Course Map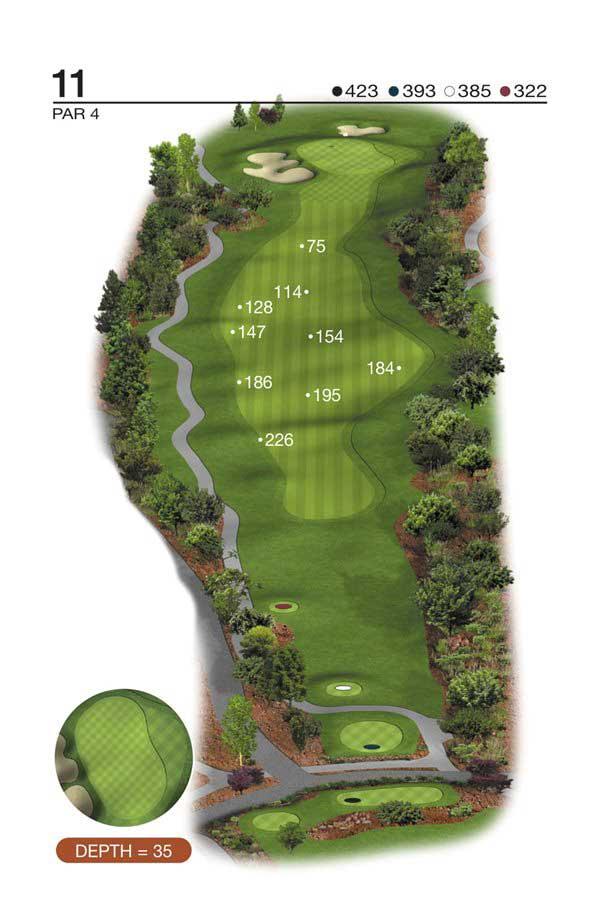

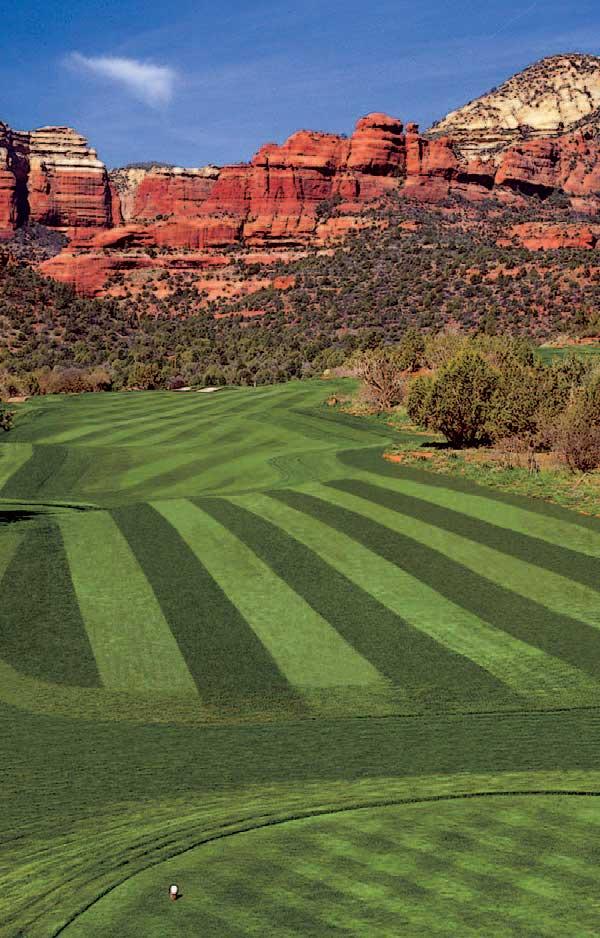
Hole 12
Arguably the most difficult hole on the course. A drive placed on the left half of the fairway provides the best angle and visibility to the small green. A “false front” to the green makes the second shot appear shorter than it really is.
Scorecard | Course Map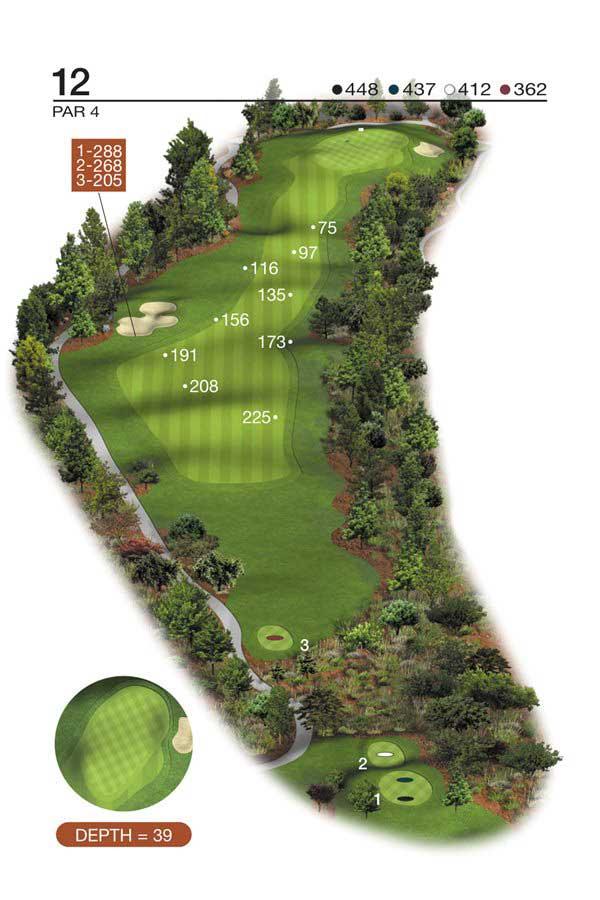

Hole 13
The longest of Seven Canyons par 5’s, the 13th hole is a true “three shot” with shorter hitters possibly having to lay up to the wash that splits the fairway. The narrow split-level green presents a difficult approach shot and is well protected by a large bunker in front, with a slope on the right side helping to feed the ball back onto the green.
Scorecard | Course Map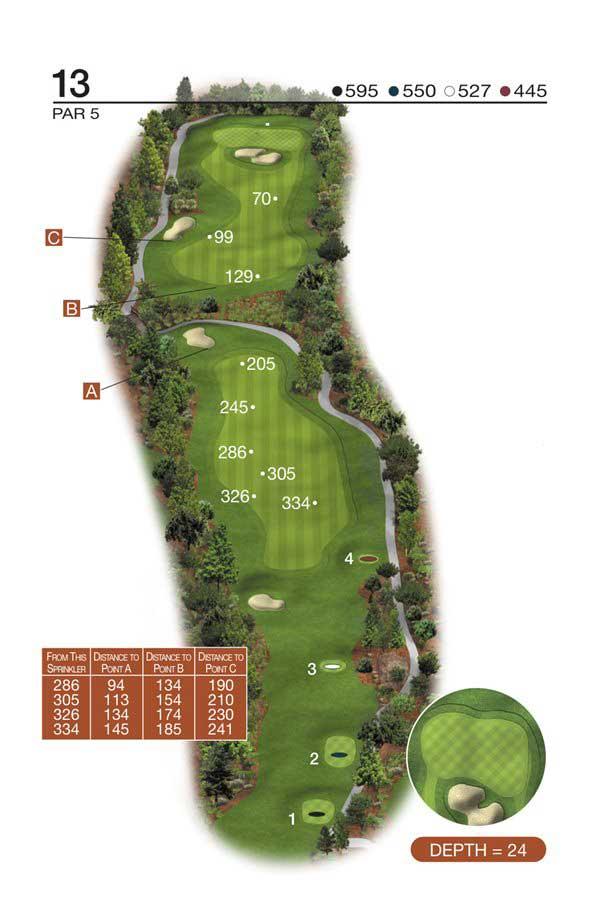
Hole 14
Often mentioned as the “signature hole” and providing one of the most dramatic views of the golf course, the tee-shot is played from the top of Rachel’s Knoll, more than 80 feet above the small, well-bunkered green.
Scorecard | Course Map

Hole 15
Playing downhill, this dogleg left features a semi-blind tee-shot with more room on the left than it appears. A directional bunker short and left off the tee defines the landing area. Favor the left side on your second shot to avoid the rock wall and bunker guarding the front right of the green.
Scorecard | Course Map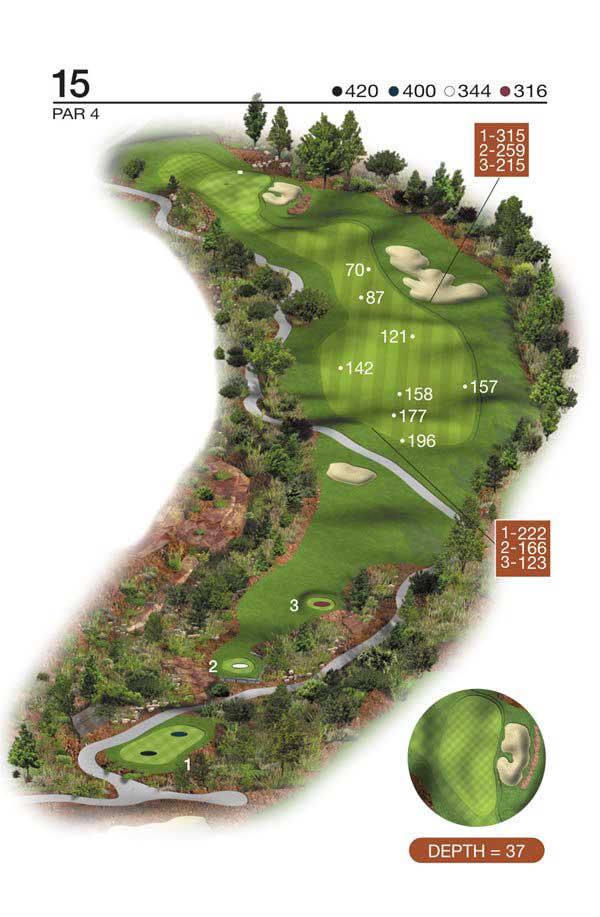
Hole 16
Water makes its debut on this short dogleg right, which is driveable by the longest hitters. A lake guards the entire right side of the landing area and the large contoured green, which is also protected by multiple bunkers.
Scorecard | Course Map
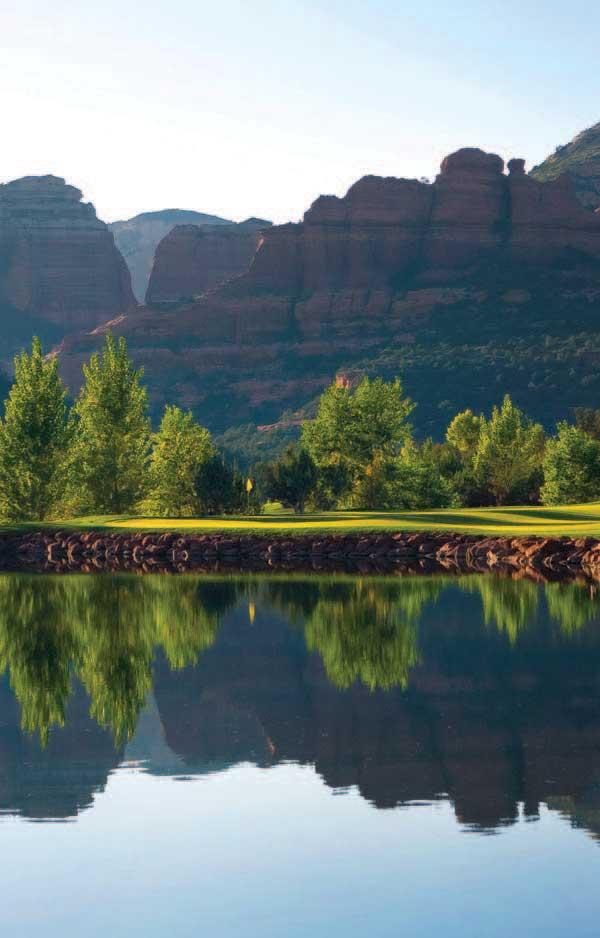
Hole 17
Hole 17 is a very demanding par 3 with a beautiful waterfall in front of tees that meander into the lake protecting the entire left side of the hole. If the tee shot isn’t hard enough, the large multi-level green makes two putting a challenge.
Scorecard | Course Map
Hole 18
The finishing hole is a long and difficult par 4 that plays slightly downhill from tee to green and gives you a panoramic view of the Mingus Mountains to the south. The smallish green is protected on the right side by wetlands and a large bunker.
Scorecard | Course Map
